|
|
|
|
|
Modeling-ABC by Wilfried Eck |
|
|
Fabric covering on control surfaces and wings - scratch built
|
||||||||||||
|
|
||||||||||||
|
|
| As told in page F fabric covering is taut - no sagging - and very smooth as the fabric has been covered with several coats of primer, filler and paint. Ribs are barely visible (discernably either by the sewing thread with which the fabric was fixed to the ribs or in some cases narrow strips of cloth covering the sewing). |
| New control surfaces and even wings are made easily. All you need is some plastic of suitable thickness and glue. In principle it works as follows: |
|
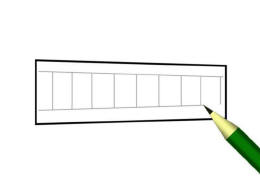
Take thin plastic and draw the outline
of desired part as well as lines where the ribs should be (kit part in
front helps a lot). Tip: As it's very probable that the front edge has to get a rounded profile add some millimeters. Let's call it upper part. |
|
|
|
|
|
|
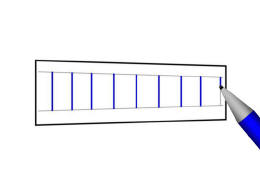
Inscribe ribs with a ball pen (ruler helpful). | |
|
|
|
|
|
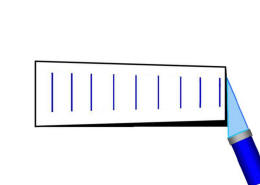
Cut out part. |
|
|
|
|
|
|
File rear to form a sharp edge (needed to get a sharp trailing edge when both parts are glued together). | |
|
Repeat steps 1 - 4 for lower part. Sides reversed! Underside of aileron may be deeper than on the top. Check model part. |
|
|
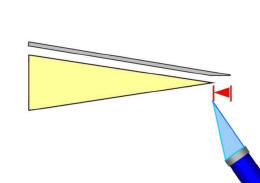
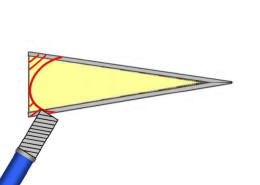
Make a core. Plastic or whatever materiel
seems appropriate as long as the top and bottom parts are easily glued on. Thickness of the core is thickness of the kit part less thickness of the two parts to be glued onto. Please notice: As the rear edges of the laminate parts are to go together, the core has to be either a little bit shorter or protudes in front (to be filed later on). |
|
|
|
|
|
|
Apply a very thin layer of glue* on one side
of the core. Apply first rib-part and press cautiously between the
ribs. * Do not use plastic glue as it will soften the ribs. CA-glue is the better choice in this case. Repeat procedure with second part. Pressing the rear/trailing edge with a ruler or else helps to get a straight line. Tip: As the rear edges are very thin they are prone to get very soft if plastic glue is used. To prevent glue getting on the upper sides a protective cover with adhesive foil helps to keep a clean surface. |
|
|
|
|
|
|
File front edge to desired aerodynamic
profile. Ready to be cemented into kit part.
|
|
|
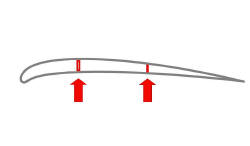
WW I wings: In principle as above but without core. Glue top and underside part together at the front. Let dry. Then merge the rear. The correct thickness of the profile is obtained by the addition of one - or if needed - two spars in the position where the struts are to go in. If a rounded profile is needed as shown in the sketch bend both parts at first. Dependent on the grade of curvature the upper part needs to be broader a little bit. |
|
|
|
|
|
|
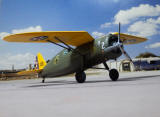
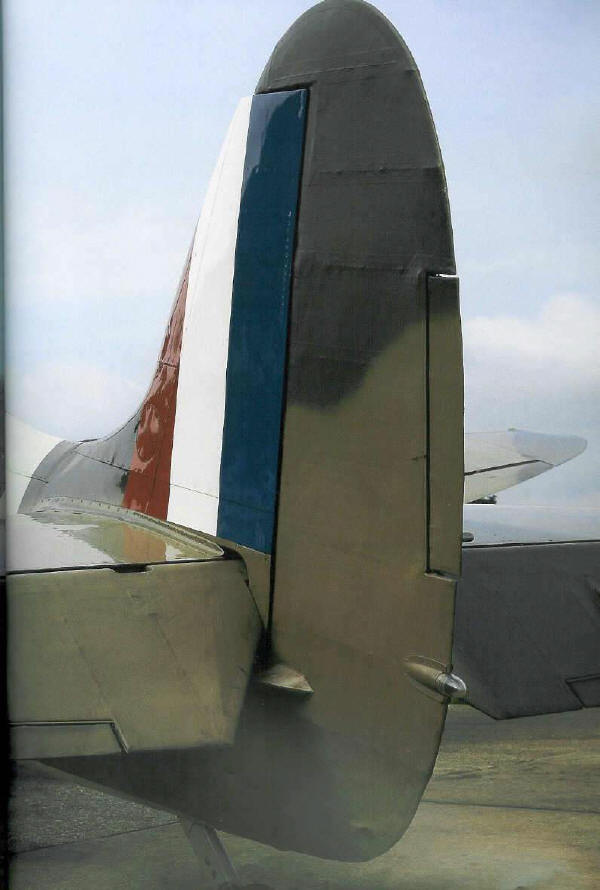
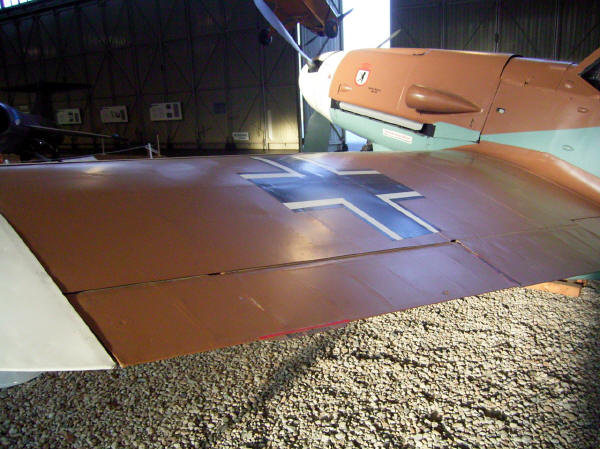
Model with fabric covered wings and empennage built as told above | |
|
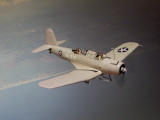
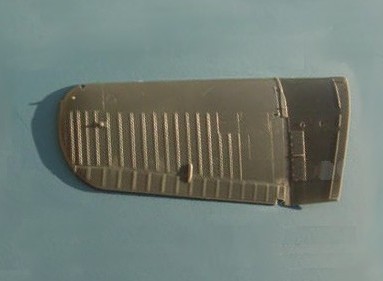
SB2U-3 Model with correction of sagging f.c. and fake external ribs |
![]()