1. Plastikmodellbauclub Nürnberg e.V.
back to index   back to 1. PMCN e.V.

Model and photos by Christian Lehmann
 
 
Diorama "Coming Home" 1/48
Used Kits: Bf 109 E-4, (Tamiya), German Railcar (Verlinden) , Buffer stop (Hauler), Different from gauge 0 model railroad parts; House, ramp, transportation rigs scratch built.
 
The idea to build this scenery was born in the 1990´ s when I bought a maintenance manual of the Bf 109E. This manual includes instructions how the plane has to be stored for rail transport. The project could not be realized that time because the necessary railcar was not available. Situation changed in the 2000´s when I discovered on in the internet at the Verlinden USA home page.
Because a diorama should tell story I decided to build a scenery that shows a damaged Bf109 returned to its production factory for repair.


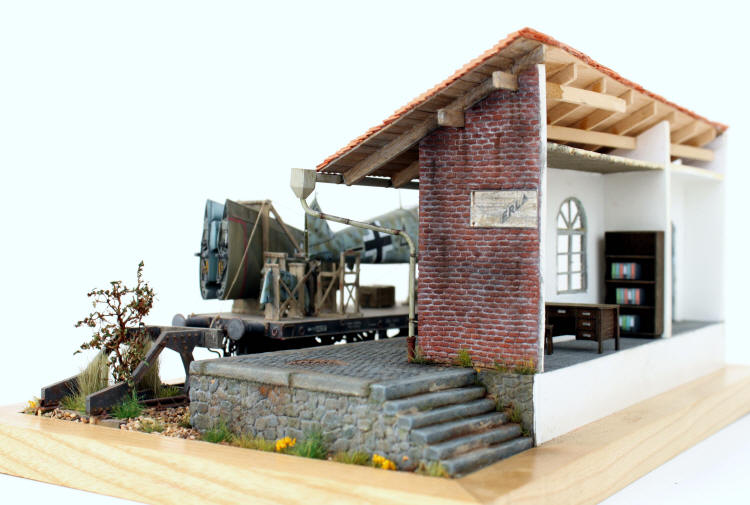
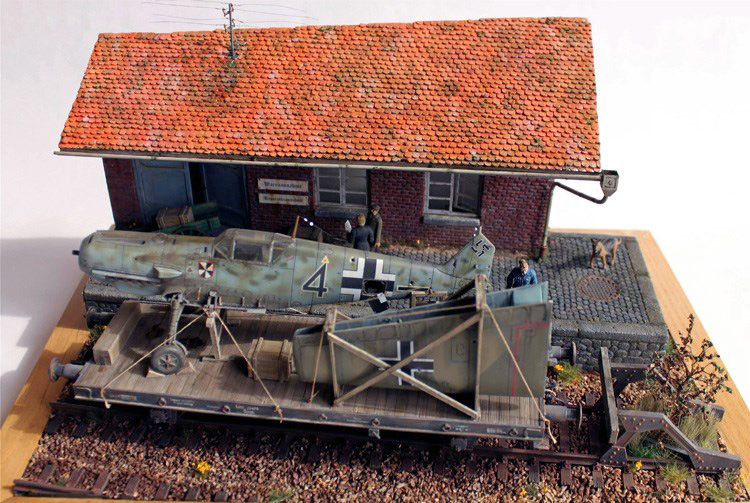
Based on the maintenance instruction I did some sketches of the fuselage and wing related structures and joints to build them by using styrene sheet and profiles. 
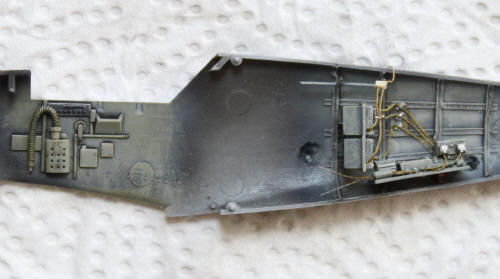
In the rear of the fuselage I used the remaining parts of an old Verlinden detail set for the radio compartment. For the cockpit hood I used a vacu part from "Clear wax". Rest of the kit was build out of the box.

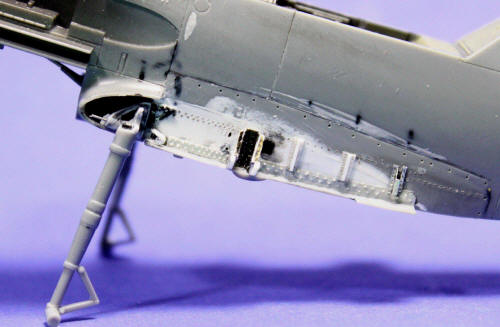
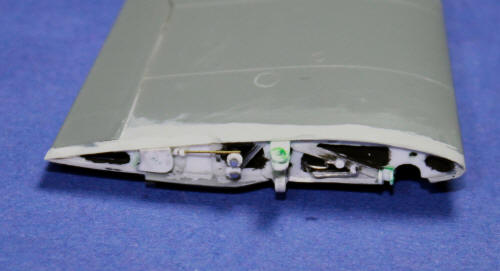
The damages of the fuselage and wings have been made with the following method: Drilling small holes at the positions of the damages. Thinning the plastic material from inside. Apply five to seven cuts from the hole in the center in radial direction. Punching a needle or tooth pic in flight directon of a projectile through the hole.

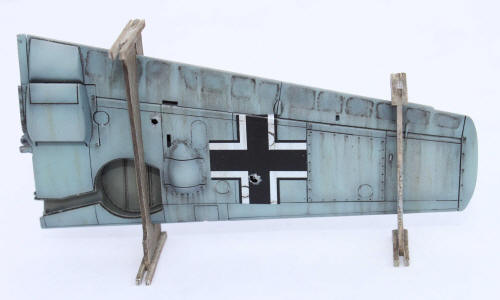
The frazzeled fabric cover of the rudder was made as follow: Removing two fields of fabric cover on the plastic part. Inserting one rib made of plastic sheet. Covering the hole arrangement with aluminum foil that was airbrushed with RLM02 inside. Blending everythin with Mr Surfacer 500. Painting the rudder outside. Punching through the aluminum foil.


The building and the ramp is made of foam by using the methods of Emmanuelle Nouaillier . The piles are self made by using "FIMO Terrakotta" clay, see below.


1. Research the dimensions of the tiles from real tiles or by using the internet.
2. Build some positive  models of the tiles by using styrene sheet and glue them on a larger piece of styrene sheet.
3. Build a border for the casting mold ( I always use Lego blocks) and fill it with silicone.
4. Press some water diluted air drying "Fimo Terrakotta" putty into the mold.
5. When dry, unmold the piles. Small air bubbles can be filled with high diluted "Fimo Terrakotta" putty.
6. Glue the piles on the roof struture
7. Weather them with different washings and colors.


  The railcar showed poor details. It was additionally detailed with bake cylinder, slack adjuster, brakes, couplings and markings from the gauge 0 aftermarket. The under floor strcture was also new built by using styrene sheet and profiles.

The design and the dimensions of the transport devices for the wings, rudders and the fuselage are part of the maintenance manual.

 
  The tracks were part of the railcar kit, gauge 0 grain was usedto embed them. The buffer stop is from Hauler and it´s gauge had to be adjusted because the tracks show a wrong narrow gauge.