|
|
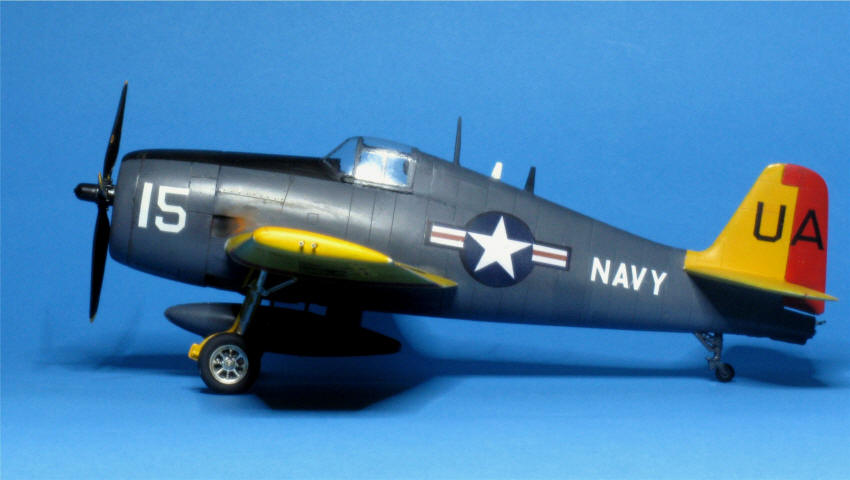
Grumman F6F-5K drone, now target tug, US Navy, VU-1, 1959, Otaki 1/48 plus scratch |
|
| 1. Plastikmodellbauclub Nürnberg e.V. |
| back to model pages | back to 1. PMCN e.V. | |
| Model and photos by Wilfried Eck | ||
|
|
Grumman F6F-5K drone, now target tug, US Navy, VU-1, 1959, Otaki 1/48 plus scratch |
|
 |
 |
 |
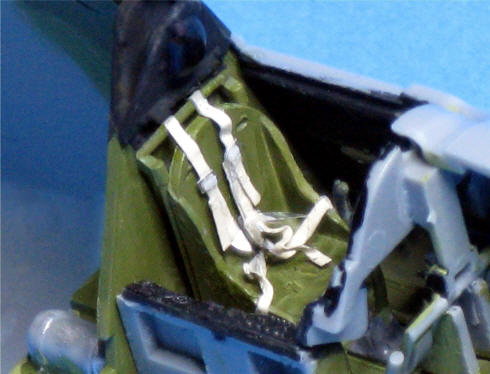
| Beginning with the cockpit,
its sparse detailing led to the decision to show the canopy hood closed. But
as the seat belts are still visible very clearly I had to make seat rails.
Unlike many a model showing the belts dangling from the top of the seat in
the real case they were led over a horizontal bar behind and above the
seat. Laid over the round seat backrest they would slip down.
Please notice: Seat belts sliding over a horizontal bar was usual on all USN wartime aircraft!). It should look like in the photo at right. As the photo supplied in Sqn.Signal shows a F6F-5K the kit -3 canopy hood was useless (not so good anyway). A new one was made in the usual way, the windshield resting in a groove, the rest on two narrow strips protuding from the canopy sill. Detailed sketches for a homemade canopy hood see ABC page C. Colours see below. |
|
|||
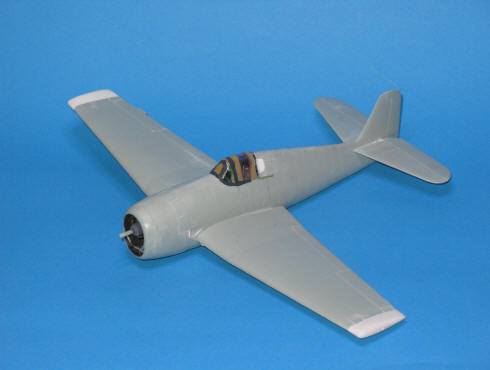
| Making wing tip tanks was
easy: At first the rounded part of the wing was removed, then a tongue
slightly shorter than the approximate width of the tanks (9 mm) was glued in
on each side. Then a not so thick layer of Polyester putty was applied as
this materiel has the consistence of dough and tends to drop if applied to
liberally. This procedure was continued until the required shape (getting
thicker to the outer edge) was obtained. Sanding to a smooth surface
and drilling two holes to accept two tubes (cotton buds thinned over a
candle flame) completed the whole affair. As the dash 5 model had the bulges in the motor cowling and lower cooling flaps removed a sharp knife and some putty was needed. Additionally the rear windows had to be filled in. In both cases some thin plastic fixed on the inside helped to give the putty some rest. |
|
|||
|
|
|||
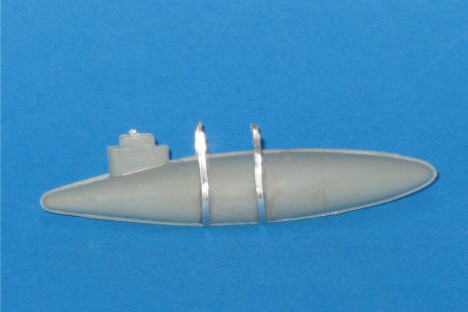
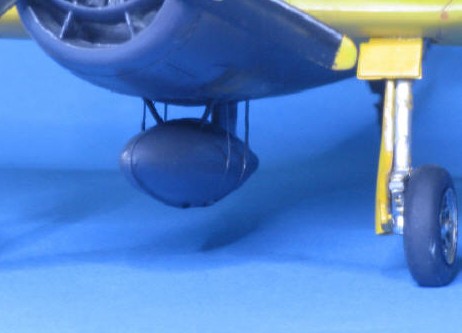
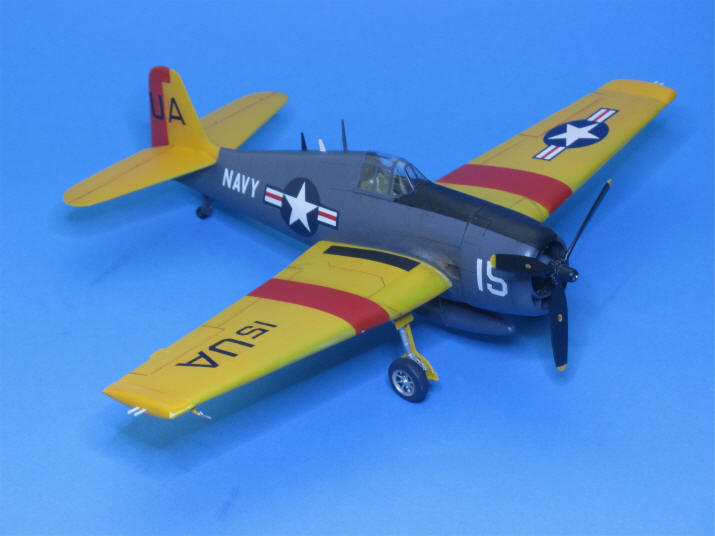
| The standard belly tank was supported by two thin bands, not by massive rods as shown in kits. In my case I used thin aluminum sheet. |
Tank installed. The main landing gear scissors are homemade (thin plastic sanded to wedge shape, two holes each drilled in, narrow trapezes cut out, front and rear with a thin rod). Thin wire was used to represent the braking line on the rear. |
|||
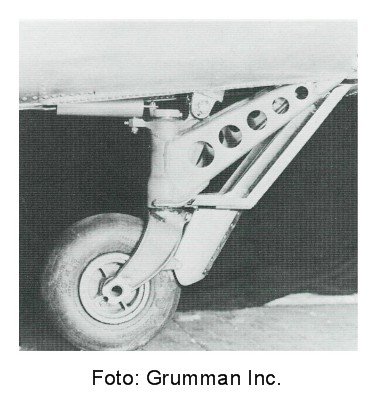
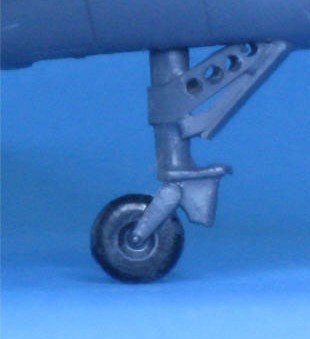
As one can see in the original photos both Hellcats had an elongated tail gear. Also the real thing doesn't show an oblique massive block (seen in most kits), thin holed sheet metal acting as a brace instead. |
|
|||
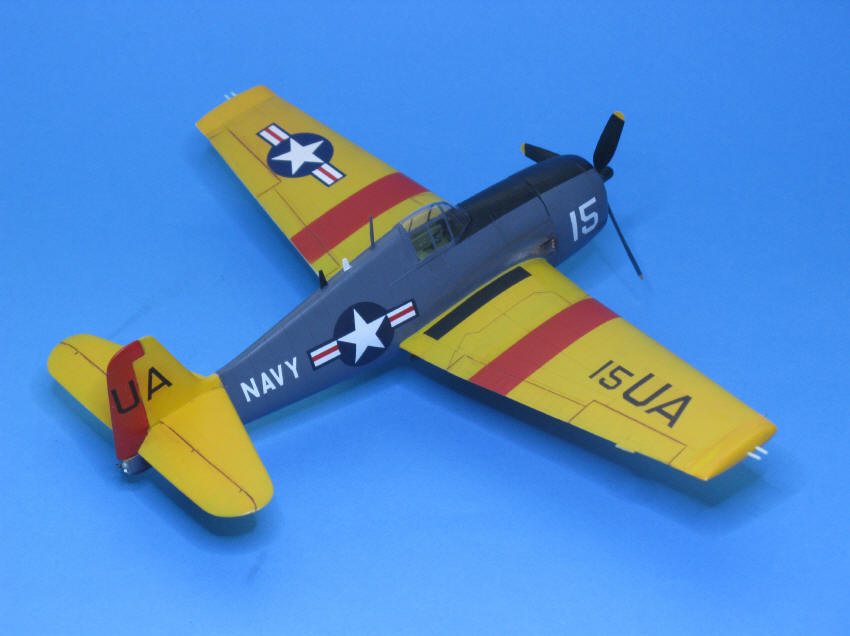
Concerning the interior color of the cockpit a modellers myth knows "Interior Green" (ANA 611). But this is only half the truth. While being ordered Dec. 21th 1942 aircraft already painted in the previously used paint were to be left as they were; to make things worse manufacturers were allowed to use up their paint stocks. So even in 1944 you could see TBF Avenger interiors painted in "Bronze Green". In effect: The color depends on the time the aircraft was built. In Oct. 10th 1944 SR-15e ordered all cockpit surfaces above the lower edge of the instrument panel to be painted in Black (FS 37038). I think most aircraft appearing in the later stages of war were painted this way (check F4U-1D's!), and accordingly as the aircraft shown wasn't an early Hellcat I used "Interior Green" for the lower area and Black for those above (Revell paints).
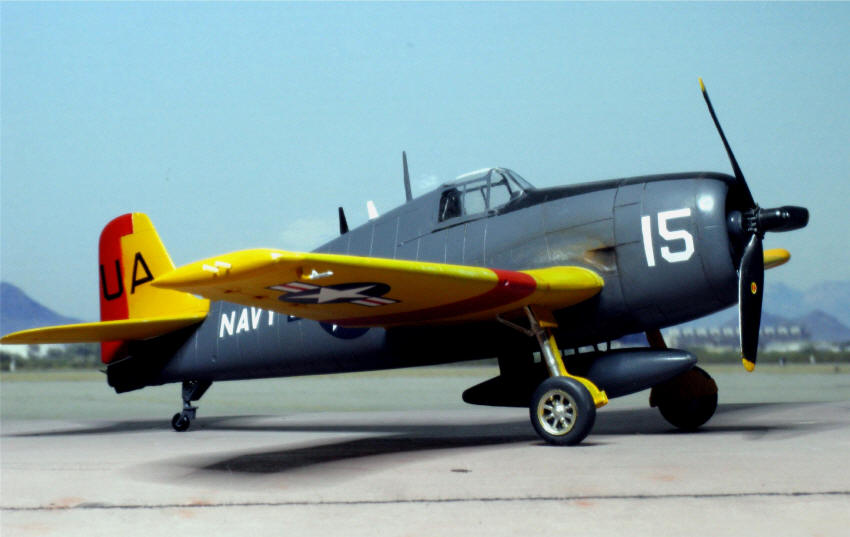
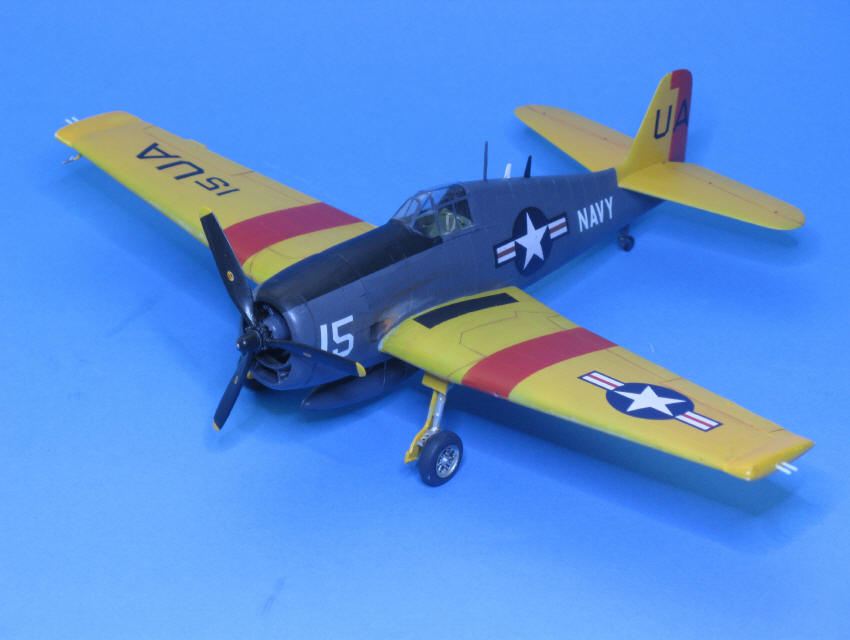
Concerning the exterior Squadron Signal states Blue for the fuselage and Yellow for wings and empennage. Well, Blue is definitely wrong. As the aircraft No. 15 of VU-1 based on Oahu was used as target tug it had the official (MIL-C-18263.AER v. 23.02.1955) paint scheme of "Engine Gray" (FS 16081) for the fuselage and "Orange Yellow" (FS 13538) for wings and empennage. Stripes for instrument trainers "Insignia Red" (FS 11136).
As the only photo available shows the aircraft in the air one is left with the question what colour the landing gear and hubs were. As there was a gradual change of paint hues during this time maybe this aircraft followed the trend towards Silver.
I used Revell paints thoroughout with appropriate mixing ("Engine Gray" 04, 08; "Orange Yellow", SM 310 with a tiny drop of red 36 which was also used for the stripes). The final coat was mixed clear and flat to obtain a slight sheen (the "1" in FS-numbers indicates "glossy", but this is not to be understood as airshow polish as well as the "3" for "non specular" meas dull /flat). Landing gear Revell 99.
Sorry the lamp I used for the model photos sometimes let the gray fuselage appear blue-gray. - It's dark gray!
Markings partially left overs or printed on clear decal paper.
In the real aircraft exhaust stains showed a merge of - from front to rear - dark brown, middle brown, dark gray, light gray. Trying to spray this is a futile effort, especially as due to aerodynamic forces the exhaust gases don't get broader but narrower instead. I used pastels, the appropriate colour being applied by use of a cotton bud and merged by careful wiping.
No "ageing" or highlighting panel lines as in most areas the Hellcat had overlapping panels. But some wear is to be seen nevertheless. The photo shows lighter specks below the cockpit. Duplicating each of these specks in exactly the same shape in my model was too much for me. Either make it correct or leave it (No fictional ageing, as this aircraft isn't a fictional one!). Sometime earlier this aircraft would have had an less used appearance.
Real colours see "Originalfarben" in German page ABC-O
 |
![]()