|
|
|
||||||||
Modelling-ABC by Wilfried Eck |
S
| Scratch building (of models): |
A legend has it the term "scratch building" originates from some modeler scratching his head figuring out how to make the desired model without custom made parts.
Many scratch built models I've seen were constructed by a multitude of parts from other kits ("... the astrodome of a B-29", the wings of a P-51" and so on). That's fine, but if you aren't lucky enough to have a B-29 in your spares box, you're out of the game.
Today there seems to be no problem in getting the desired parts in resin or metal, isn't it? - Well, sometimes it's just a matter of how much you are willing to spend. Sometimes there are imperfections to be corrected. And sometimes it's simply useless. And, not to forget, some aircraft are simply neclected (F9F-8 and A3D in 1/48 for example).
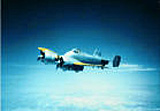
But if one can mould canopies from PVC sheet (see page C) there should be no problem to form fuselage halves, cowlings and so on as well. My idea: A whole model without any part from a kit. And, indeed, it worked, and was fun to build too! - Example: 1/48 Skyrocket (long before a kit appeared, see F5F Skyrocket model and following page showing construction).
I made the fuselage of four segments, each sub-half being cut out along a line on the polyester form and mated to the other by underlying plastic strips.
The wings are built up by laminating a balsa wood core with polystyrene sheet. The best way is to add upper and lower parts to a leading edge part. This is formed the usual way: An appropriate strip of plastic sheet is tacked to two wooden strips, heated over a toaster till it gets sloppy and then pulled over the wooden wing leading edge. Exess plastic is removed in a straight line adhering to the original outline. To fix these parts cyanacrylate cement does best. Top and lower parts are cut out and the rear edges on the insides thinned so they form a sharp trailing edge. The outline of the ailerons is carved in after both parts are fixed to the wooden wing core. An inset spar in the fuselage is helpful to fix the wings in the correct angle. Also a rib made of polystyrene and cemented to the inner side of the wing may help fixing with plastic cement.
Simulating fabric covering is easily done: Trace the outlines of the fictional ribs on the insides of the plastic part with a pencil, place this on cardboard (or a magazine) and with slight pressure trace the "rib lines" with a ball pen. In effect there should be a slight ridge on the outer side. This is sufficient, for the real fabric covering was taut and not wavy.
Motor/s are a different thing. Just to prove a model could be built without using a single kit part, I carved the cylinders out of plastic trees/sprue, wrapped layers of thin copper thread around them, added rocker arms from stretched sprue and cables from wire, all fixed to a scratch built gear box (filed and drilled from some plastic block). But there should be no problem to find a suitable one in the spares box or buy it on the after market.
Same goes for the wheels. They can be drilled from plastic blocks (laminated thinner parts if necessary). Another way would be to heat a length of plastic sprue, bend it around a rod of appropriate diameter, cut through where both ends overlap, and after bending to meet both ends, cement the ends together. The hubs have to be formed/drilled from scrap plastic. - But here again checking the spares box could save some work.
Airscrews/propellers are easy: Take a narrow strip of plastic approximately the thickness of the prop foot. Heat it over a candle on both sides till it gets sloppy, take it aside and wait for one or two seconds and then pull it apart at both ends steadily with a slight twisting motion (prop blades have more incidence at the root than at the tips). Now you have a part which is thinner in the middle and thicker on the outsides. With a cut in the middle you get two parts to start with. Trace and cut out the desired outline of the prop blade to be, sand it to get an aerofoil profile and a circular diameter at the foot. Fasten these parts into predrilled holes in the hub (to place the hub on a templete showing the correct angles helps a lot to get equal distances between the prop tips).
If you have a lot of money to spend there should be no problem to get every part you want by some manufacturer. But when I read about some not-so-cheap resin kit sporting a number of imperfections which need a lot of work to correct I wonder why I should not spend this time on a homemade model from the beginning. It's cheaper too.
Also see
| Airscrews/Propellers home made |
| Cockpit hood homemade |
| Fabric covering homemade |
| Folded wings |
| Position- and navigation lights |
| Preventing hard spray edges |
| Model pages I and III |